Tuesday, October 25, 2016

Bead Weaving in the Keys - textured patterns

Loooove creating textured patterns.  Lately, I have been popping in a larger size bead every so many rows just to make things curvy interesting.  And, with my rings, I have given my brain full access to stream of consciousness designs.  Now, that's just a fancy way of saying I am doing my own thing and loving it!  These items are mostly a mix of peyote and brick stitch.  A couple rings are right angle weave.
After I created the turquoise one, I realized it looked a bit like the design in my bathroom rug, except the rug is more random.  Maybe next design.

The two rings on the right have a right angle weave base.  I added the embellishments after  making the base.
These are all a combo of peyote and brick stitch edges.


Friday, September 9, 2016

Sputniks!!!

I guess you could say I am a curious person.  If I learn something in a class or from a book, my brain starts whirling.  What if I did this?  What if I used that?  I get filled with a driven passion to adapt the techniques or apply them in a new way for me.  So, it was inevitable that once I learned a few patterns from  Anna Elizaeth Draeger's book, I would begin adapting them and making them my own.

In this case, I used a bunch of dagger beads that have been feeling very neglected.  They were up for the experiment and so was I so I used them to create Ms. Draeger's bauble bead and then I embellished them using a technique I learned from another of her patterns.  Here's the result.

I absolutely love how these just stand up on their own like little R2D2's.  I am naming this series "Sputniks".

I liked them so much I created this set next.


Sunday, August 28, 2016

Bead Weaving - Fixing a Droop problem

My beading style is very intuitive.  Yes, I take classes and yes I look at videos and books and other people's work, but when it comes right down doing the deed, I like to just sit down with a palette of beads, and needle and thread.  And, off I go.

For this project, I dug through some stash and spread it out on my bead pad.  My beadweaving bead stash has not been refreshed in a while and therefore, I don't have any of the 2-hole dagger beads.  I don't have many 2-holed beads at all for that matter. But, I do have some beautiful one hole dagger beads that I decided to incorporate into this piece.

 I started the pendant by stitching around a winter white wood bead, adding layers before embellishing with the daggers.  Once I put daggers all around, it flopped when I held it up.  I expected it to do that but just figured I would find a way to resolve it.

 First, I stitched some beads in a triangular shape behind the daggers.  This provided some support.  They no longer drooped backwards.  Now, they drooped forward.

My solution to that was to stitch gold size 11's around each dagger to hold the front in place but now it looked boring.   The pretty daggers were obscured by some rather bland gold tone beads.

 Then, I remembered my big supersize stash of sequins!!!.  I chose the silver sequins cause they seemed to pop against the rest of the piece.   I liked the watery, mirror effect too.

Just for good measure, I stitched a row of size 11's around the back as I moved from sequin to sequin.  Now, those babies stayed in place.

For the necklace part, I tried going with just a simple strung strand but surprising as this may sound, I felt it took away  from the pendant.  I had been hankering to do some freeform stitching so I decided to stitch around the beads I had strung.  I like this...for now.  I made it so I could easily detach the strands should I decide on a different arrangement in the future.

Here is the final product.


ABS Challenge August - Dressing up your Poly Clay Pendants

I like funky.  A lot.  If something has a bit of a shabby look to it, I'm in.  That doesn't mean I don't like to dress things up sometimes.

This month I was checking out the Art Bead Scene (ABS) monthly challenge and it inspired me to weave a little bead stitching into one of my pendants.  While the palette in my pendant is quite a bit brighter than the Paul Klee's (shown below), I immediately saw the color connection with his.

His pendant is more abstract than mine yet just looking at Klee's rendering, I instantly knew he was capturing a nature scene.  And, I just as instantly thought of my pendant.  Mine is abstract too but in a much more diffused way.  My lines are softer because in my mind's eye, I saw the flowers in a rather unkept garden spilling over themselves versus in a park.

Because I liked the lines in his painting, I decided to add some of my own straight,dotted, and V shapes by stitching a couple rows of beads and adding "flowers."  AND I did so because I scored a huge stock of sequins and therefore every embellishment requires the use of sequins until I bore myself to death with the use of them!!

Anyway, here are pictures of the pendant and the necklace I made from it.  Also pictured below is the other side of this double sided pendant.  I only entered my pendant in the challenge as I was not sure I could use the same piece in both the bead and the jewelry entries.


 And here is the Paul Klee painting.

And here is the necklace.

 And here is the other side of the pendant.


Here is the link to the rest of the entries.  Go check them out.  Art Bead Scene blog

Tuesday, August 23, 2016

Bead Embroidery - How to destroy your Eyesight in Two Weeks

Take on a bead embroidery project!  As some of you know, for the past couple years, I have refocused my time primarily on polymer clay bead making and jewelry work.  So, here's the backstory as to how I became crazed to the point of spending countless hours consecutively stitching hundreds of seed beads to create this final bead embroidered piece.

I was full steam ahead in poly clay making in June.  Then, a family visit hit in July and the guests were here for a month.  Thoroughly enjoyable.  No bead work done.  I know that sounds counter intuitive but I really was ok with the time off and the month long visit.

After my guest leave, I decide I am going to finish the studio cleanup I started before they got here.  If you get what I'm saying, that would mean going thru the stuff I just crammed in drawers when I ran out of clean up time before they arrived.  So, I pull out this piece of lacy's stiff stuff with 3 beads glued on it and a tiny bit of bead embroidery completed.  It was a piece I had grand ideas for over a year ago, but just couldn't get it together.

Oh, I almost forgot.  What stimulated my renewed effort to complete the studio cleanup was a surprise haul I picked up off the streets of Key West (pic at bottom).  I could really digress here but let me just say the things people throw out here would blow your mind.  People have furnished whole houses with the stuff!!!

Anyway, it was sorting and organizing all those beads that started giving me ideas of how to complete the piece.  I realized half of the problem was not really knowing what I have anymore or where exactly it is.  And so began the process of finishing this piece.  15 days later at an average of 8 hours a day, here is what I came up with including the final project and progress steps.


The "bead" that looks like a mirror on the right front is actually a piece of cut dichroic glass I found from a previous class I attended years ago.  I actually glued a piece of fiber around it because I was afraid it would cut my thread.  Below are the progress pictures.
This was after a few days.  Some of the most intensive work is peyote stitching around the glued cabs.  


More progress.  added a few more cabs because my eyesight was still fairly good.


This is about day 12.  Nearly done and before I will cut the lacy's flush against the beadwork.  I look at it to see how I want to embellish (that was adding the glass leaves, pearls on sequins, etc).  Basically, I am looking to see what might need some more flare or covering.  Sometimes there are tiny white gaps which make a perfect place to embellish.  The other thing I like to do before gluing on the ultrasuede backing is to look at the curves along the edge.  If they are too steep, I know I may run into buckling problems when I  brick stitch the edges so I add beads to smooth them out some.  The last step after gluing the backing on is to stitch it to the lacy's stiff stuff.  I like to use brick stitch but there are other options.


This is the final product cause I can never let well enough alone!
This is my dumpster diving haul that jump started me organizing my beads again.  And yes, it is full now.

Wednesday, June 29, 2016

ABS June Challenge

I adore the retro colors of the June challenge which features an art nouveau style poster showing a young woman reading a magazine.  I love the tangle of flowers wildly floating inside the frame.  I imagine her unbound hair would dance just as wildly were it set free.

  I felt that same wildness in the tendrils of my brain when I was creating these mini poly clay portrait style pendants.  It had been a long time since I worked with resin and emphera and I confess I felt both joy and fear in my mad experiments.  And I also felt a strange sense of abandon and release and totally immersed in the act of "play."  Isn't it lovely when that happens?  


As to the process, I started with plain white clay that I lightly textured using fabric as my texture tool.  Then I finger painted various colors very lightly using Genesis Heat set Paints. When all that was completed and baked, I resined the flowers and mod podged the papers.  After everything was dry/cured, I attached the flowers and papers to the baked/painted clay using resin.  That stamp on the pendant on the right I snuck from my boyfriend's collection. I fessed up of course (after the deed was done).

Below is the June challenge picture.

Go here to see more info on the challenge and other entries.  

Saturday, June 25, 2016

Dry Gulch Challenge June 16 - Pretty in pinks

I love a challenge.  This one, sponsored by Dry Gulch Beads, features a particularly pretty, soft palette.   It really inspired me to look through my bead and fiber stash and find a nice soup to mix together.  Here is what I created.


And here is the color palette.  I hit most of the colors though might be difficult to see in this shot.


For more info on the challenge (deadline is June 30 and involves prizes), go here.

You Know you Have an Addiction When...

You go to the local Ben Franklin store for the third straight day just because they are having a 75% Going Out of Business sale!!!!

Well, I actually made and drank a cup of coffee, fed the pups, and took pictures of my beads for an etsy shop posting BEFORE I went back to the Key West Ben Franklin store...for the third day straight. 

 And, I ain't going back again.  So, take a letter Maria.  Address it to my therapist.  Send a copy to my extended family. Got start a new life.  Only some of you will get what I mean by this last paragraph.  oldies but goodies! 

 Anyway, here is my haul.  Filled three of my baskets.  


Friday, June 24, 2016

Before and After - Relishing Redo's

I don't know about you but I relish remaking things.  Not in the moment as I am making them because that is rework.  No, maybe months, even years after.  I have a bag full of jewelry waiting to be remade.  However, I never touch it.  Well, I touch it but mostly put things back.  The jewelry I want to remake and the jewelry I do remake is often the stuff sitting on display in my studio or in my own personal collection.

I have all the pieces I made in the last several months hanging on busts or jewelry stands and every now and again, I scan them for remake potential.   Sometimes the remake is rather simple.  Sometimes it is very messy.  Sometimes it goes into the bag of stuff  to be remade and is never heard from again.

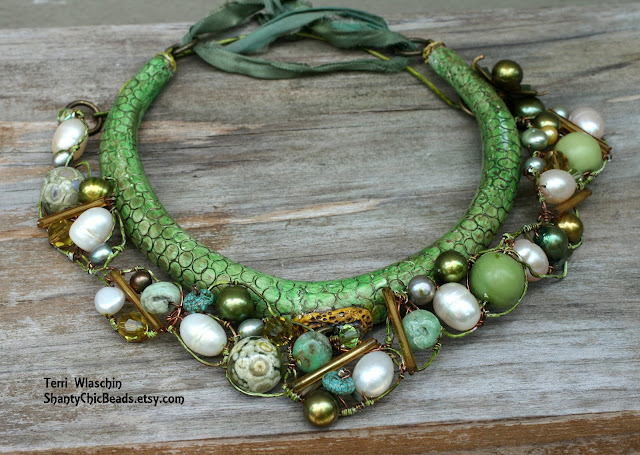
 The remake that is the subject of this post involved two items I am very fond of individually.  And, actually, they can still be worn separately.   The wirework piece which has primarily cultured pearls, jasper, and swarovski crystals started as a rather busy piece.  But, then I removed part of it and created two separate necklaces.  The poly clay snakeskin piece had a couple lives also as shown in the photos below.  Anyhow, I am starting with the final result first and then what follows are the various "before" versions of both pieces. 


The Final version...for now!!!


Below is what the original wirework piece looked like.  Was way too busy but it took me several months to realize that.

 I eventually removed the piece that was on the right hand side and used part of it to create the necklace below.

The remaining piece I put in my personal collection though I have hardly worn it.  See photo below.  This photo is not a very good one but I was too lazy to take a new one.

Here is how the poly clay snakeskin started its life.  Had a bunch of bead woven beads spilling down the neck.  I liked that but got tired of looking at it.


For Version 2 of the Snakeskin necklace, I replace the chain and pendant  for a softer look.  I liked that too but, for now, I like the pearl snakeskin combo.  Will see what happens in a few months.  ha ha.


And that's all for now.

Monday, June 20, 2016

Mini mixed media poly clay portraits


Roberta Marks is a no nonsense artist who creates mixed media artwork that  is "often constructed with curious objects and hints of collected memories."  Having seen her exhibit recently at Key West Customs House, I was inspired to create my own mini mixed media Portrait pendants.  I started with either black, white, or muddy clay backgrounds and cut out various size squares and rectangles to create small abstract like paintings.  Most I textured using fabric or ceramic tiles and things like manual drills, and circle cutters.  In the case of the black and white one with transfer image on side one and white flower on back, I used a marxit tool, which I really liked.  I am thinking of making a blackboard and "chalking" in a saying on it.  

I painted each canvas with Genesis Heat Set paints.  I dressed some of
the canvas' with image transfers or emphera which I mod podged  before applying resin to secure the papers and objects in place. 
Side One - Includes a variety of techniques.  The images with flowers were done by finger painting on Genesis Heat Set paints onto stamps and then stamping on the baked, painted clay.  The bottom pendant has a series of yoga poses I stamped on.


Side Two - same techniques.  For pendant with green cutouts in next to last row, I first painted underneath on baked clay and added a backing which I cut out.
Side One closeup of Top Half
Side one - Closeup of Bottom Half

Side Two - Top Row

Side Two - Middle Row


Side Two - Bottom row


Close up of Letter pendants.  I especially like the pendants on the bottom.  I can see the swirls from the texture pad I used in the one on bottom left and overall it has a really rustic look.  The one on bottom right has 'Floating papers 3D look,"  which I love.


This is one of my more minimalistic "paintings"  I used a combo of finger painting and stamping to get the effect.  I like the idea of painting all around the edges  with messy strokes to give it more the look of a shabby well worn look.


I read somewhere online about using an incense stick to burn edges and holes in paper.  Makes so much sense and was quite fun!  Will try it on fabric too sometime!

Monday, June 6, 2016

Peacock pretty - Before and After

Many years ago when I was just a baby clayer, I took a class with Christie Friesen to make a peacock.  When I finished that class, I was, well, proud as a peacock.

 It's only many years later, when I dusted the piece off again, that I found myself scrunching my nose at it.  If you are a bead or jewelry artist, I think you know exactly the look I mean.  Often accompanied, it is, by a silent "what was I thinking" and then by air involuntarily releasing itself from puffed cheeks.  But I am a real believer that anything can be saved.  And I mean anything (just about).

 And that's where paint comes in, which is my favorite first responder tool.  I used Genesis Heat Set Paints to transform the colors from blah to fab (at least that is what I think today) and threw in some of my painted metal and wirework connectors to redesign the necklace.

Here are the results starting with the AFTER.

The make over results
Below is the BEFORE